Wednesday, 9 July 2014

'GUAVA CHEESECAKE with JABOTICABA GELEE.'

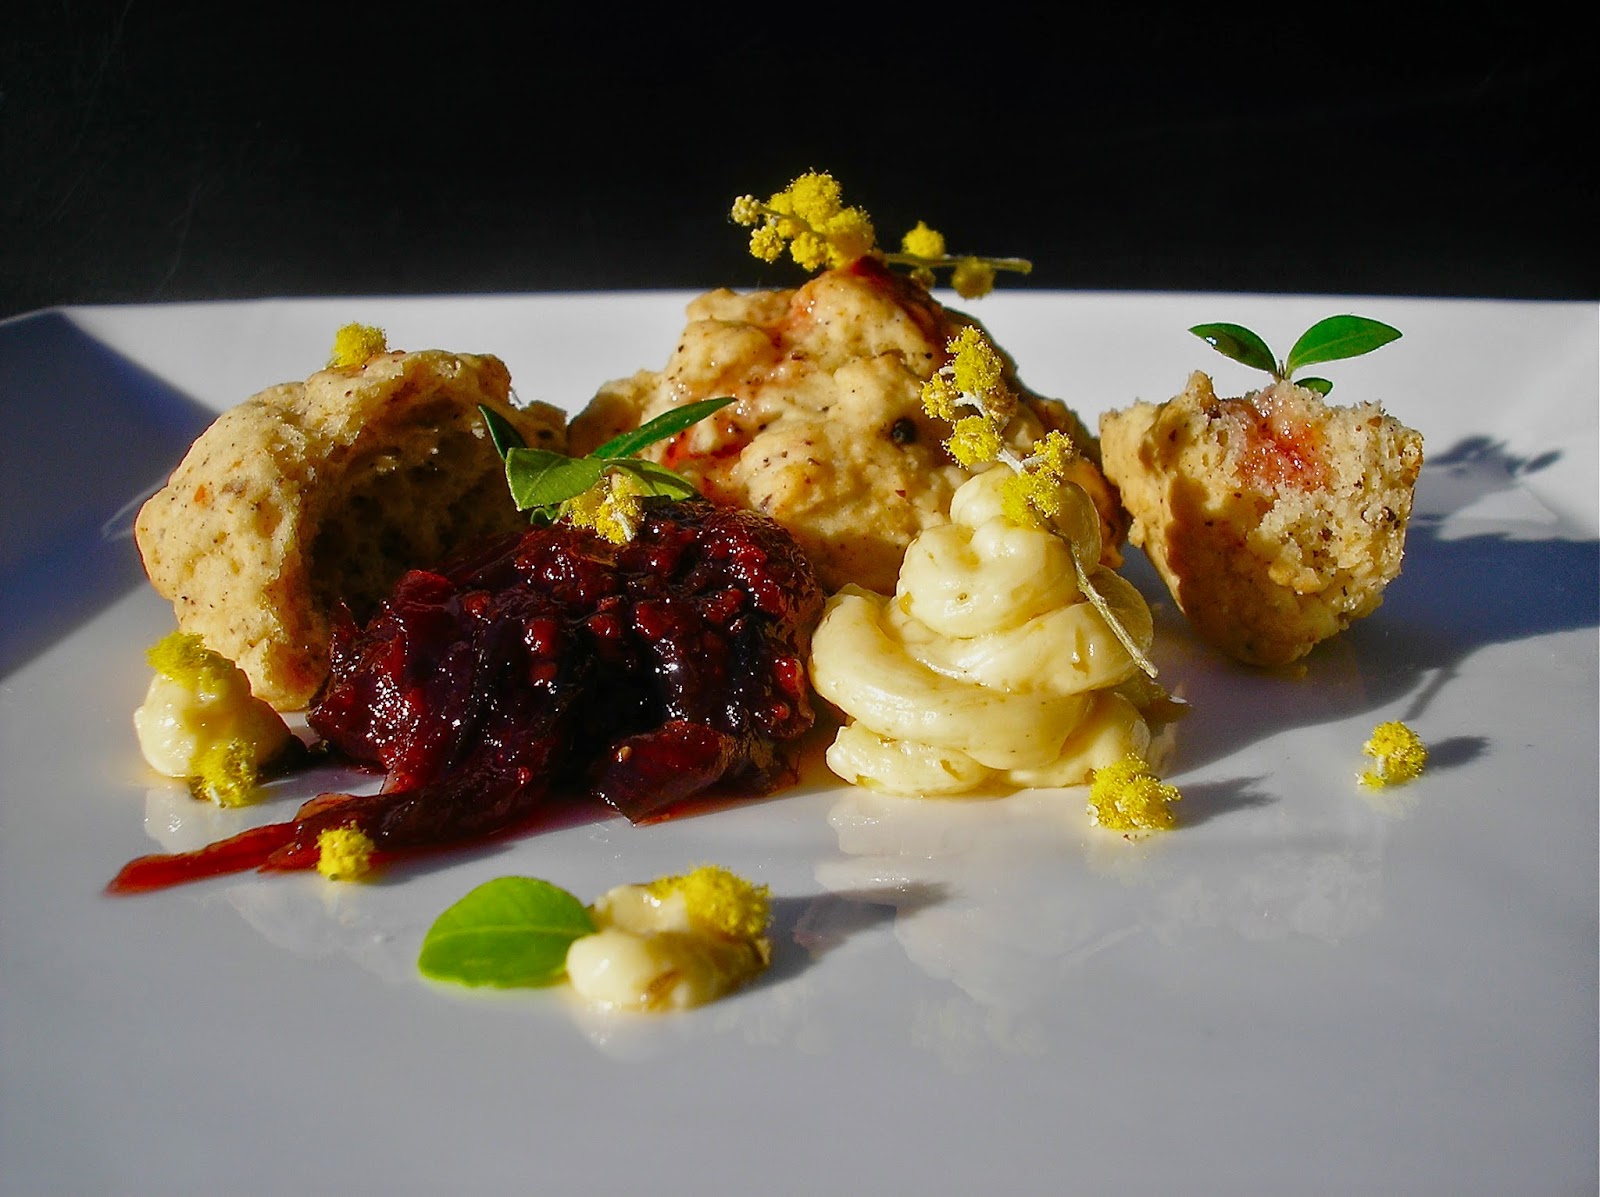
Guava Cotten-soft Cheesecake with Jaboticaba gelee, served with a Tamarillo, red wine & honey sauce, Passionfruit tuile, Lemon balm and Edible violet pansy.


                      This dessert uses four fruits from the south american region that we have been harvesting since the start of last month. We have a guava cheesecake, a jaboticaba gelee, a tamarillo sauce and a passionfruit tuile. For a few months now I've been collecting the ripened fruit from these four varieties and freezing the pulp, as the fruit ripens at various times, sometimes it may mean picking the odd berry here and there to beat the birds and have enough at the end of season to use them for something, only while our fruit trees are still in their early years and not bearing much fruit. This dish I guess is one of those end of season uses I was talking about, this is the rewards of our south american fruit harvests. The odd passionfruit is still falling from their vine and people have ice on their car windows in the morning, I don't understand. The peach and fig tree have gone into winer dormancy but I've got a rogue bitter melon cucumber plant flowering in the veggie patch. My coffee plants are holding the worst season of cherries by yield in the 6 years they been fruiting and the local strawberry farmers here are bracing themselves for a record high season, so try and plan for that.                                                          
                     Below is a scaled recipe and detailed method for each prep, you can have fun with this one and change up the fruits, like have a strawberry cheesecake with a sour cherry gelee or something. This is a cotten-soft cheesecake meaning the texture is soft and melts in your mouth. The recipe uses a combination of the traditional cheesecake with the fluffy texture of the sponge chiffon cake, with the flavour coming from added fruit puree.                                                                                                          
COTTEN-SOFT GUAVA CHEESECAKE- To make this cake I first preheated a 160C oven and greased and lined a 6" square and 1" high cake tin. I then halved and scooped out the pulp of 6 guavas into a blender and blended to a puree, making 1 cup of strained puree. Over a saucepan of gently simmer water I placed a heat proof bowl, adding to the bowl 125g of chopped cream cheese, 25g of chopped butter and 50ml of milk. I then mixed with a whisk until melted and smooth, removing the bowl from the heat and allowing to cool. I then added 35g of plain flour, 20g of cornflour, 1/2 tbsp of lemon juice, 3 egg yolks and a pinch of salt, stirring to incorporate. Using an electric beater, in a separate bowl I whipped 3 egg whites and a 1/4 tsp of cream of tartar until foamy, continuing to whip I added 70g of caster sugar in 3 batches to form a soft peak stage. I then folded the guava puree through the cream cheese mixture and then folded in the egg whites, this was then poured into the lined tin and baked for 40 minutes. The oven was then switched off and the cheesecake was left to cool completely in the oven before being removed from the tin and sliced into portion sizes.                                                                                                        
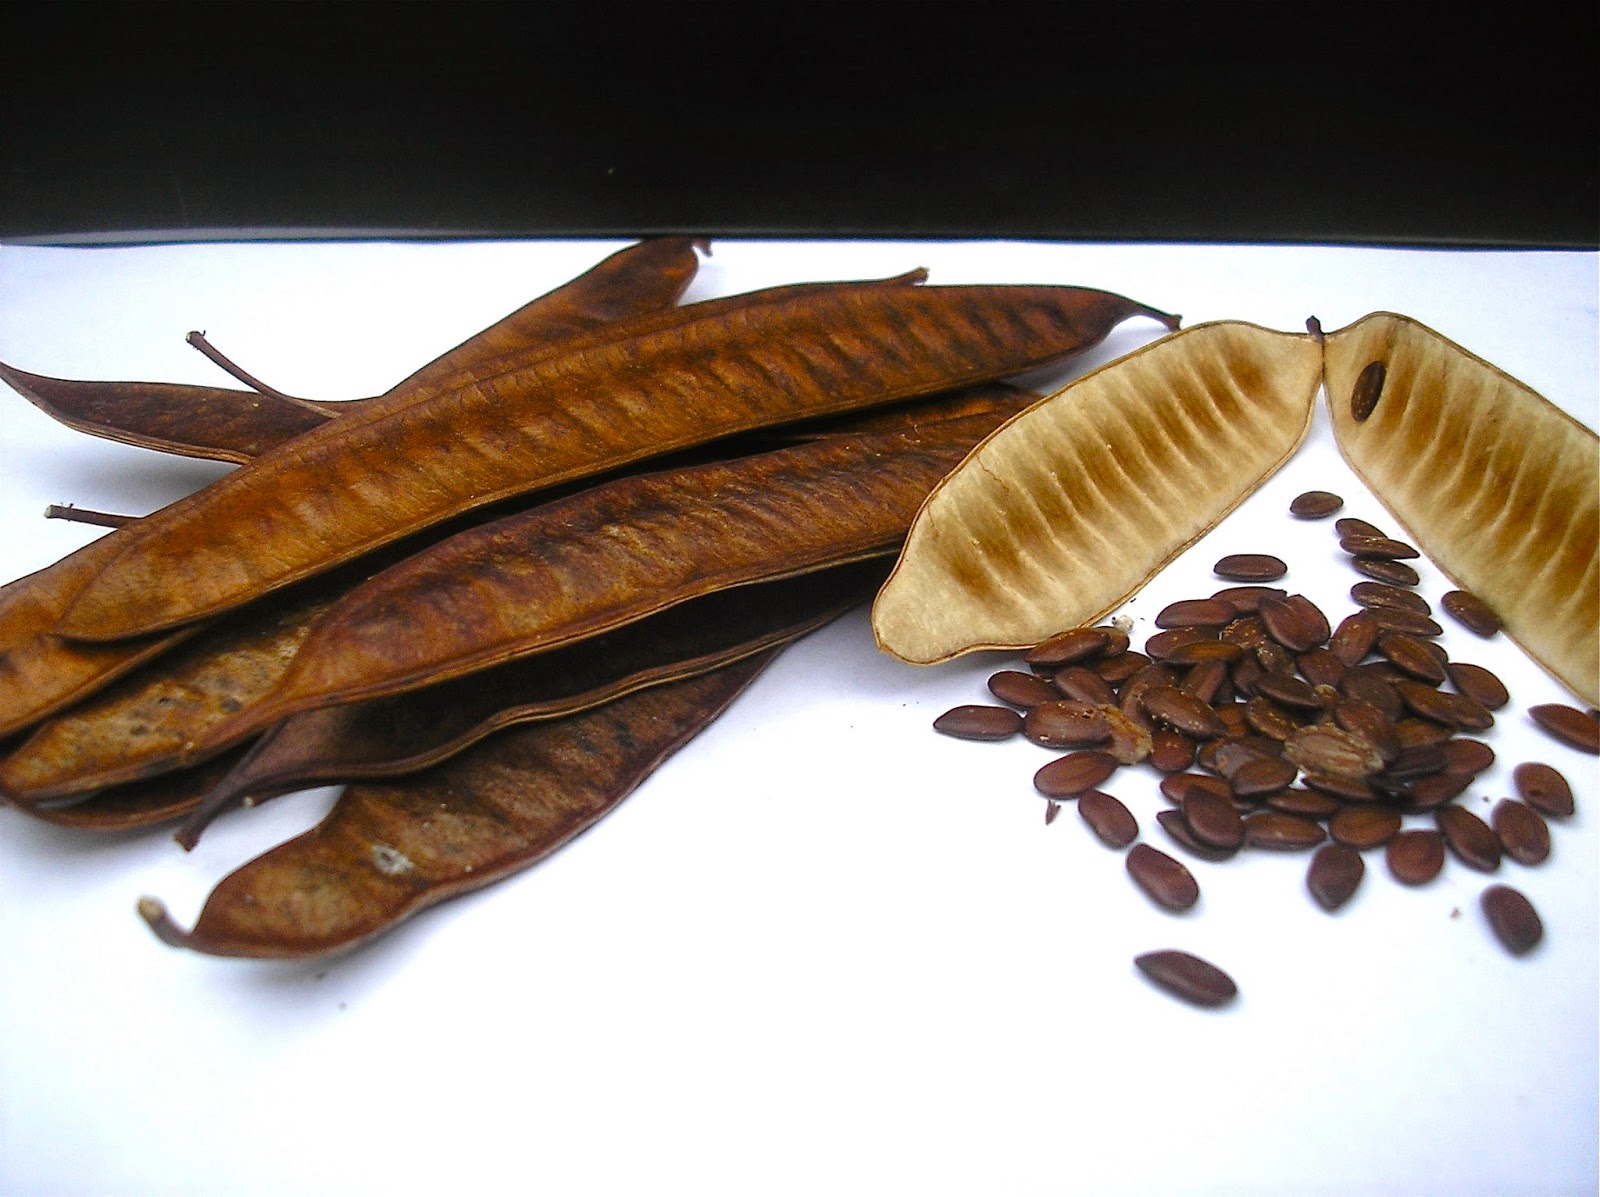
JABOTICABA GELEE- To make the gelee which is the purplish jelly film you see on top of the cheesecake, I washed and deseeded 12-14 small jaboticaba, placing them into a small saucepan with enough water to cover ( about 1 1/2 cups ) and a 1/4 cup of caster sugar. This was brought to a simmer for about 20 minutes, reducing the liquid to 1 cup of purplish coloured thin syrup. The syrup was then strained and the fruit pulp and skins discarded, the liquid was returned to the the saucepan and brought back to a gentle simmer. I then added 1 tsp of agar agar to the syrup, while whisking to dissolve the agar agar. This was then removed from the stove and poured out over a flat oven tray and allowed to set on the bench top. When the gelee had cooled and set I cut out appropriate sized rectangles to fit on top of the cheesecake portions.                                                                                                                              
TAMARILLO, RED WINE & HONEY SAUCE- This sauce actually came from the poaching liquids in the baked tamarillo dish and was reserved to eat with custard or ice cream or something. The sauce was made by simply baking tamarillo fruit in 1 cup of red wine, star anise and 2tbsp of honey. The remaining poaching liquid was further reduced and reserved for later preparations.                                      
PASSIONFRUIT TUILE- To make the tuile I gently heated 50g of glucose in a saucepan on low, once the glucose was running freely I added 60g of passionfruit puree without seeds and mixed the two together to form a syrup. This was then removed from the heat and poured into a mixing bowl, to which I added 75g of icing sugar and 60g of flour, mixing together to form a stiff batter. I then added 30g of melted butter and mixed through completely, I then placed the mix in the fridge to firm up a little. To make the tuile shape I spread the tuile mixture 1mm thick, between two strips of masking tape 5mm apart on a flat baking tray. Once I was happy the mixture was spread evenly and thinly from end to end, I removed the strips of tape to reveal a perfect straight 20cm long, 5mm wide and 1 mm high strip of uncooked tuile batter. This was then baked in a 190C oven for about 4-5 minutes until the edges began to colour and working very quickly and carefully while the baked tuile is still warm I was able to manipulate it around a pole to form a spiral, within twenty seconds of being out of the oven the tuile is crisp and vulnerable to humidity and moisture.


Tuesday, 8 July 2014

' BLACK - SEA OLIVES .'

 Baby Octopus heads cooked in a mixture of mirepoix & squid ink and marinated in olive brine served with Extra Virgin  cold-pressed Olive oil, Red chilli paste and micro Oregano leaves.  


                 This Mediterranean inspired hors d'oeuvre was a clever use of a by-product to another dish. So if you haven't guessed it by now, you are looking at baby octopus heads that look like olives and not black olives stuffed with octopus. I was experimenting with a Japanese dish that only required the tentacles of the octopuses and was left with the severed heads, when I remembered I had archived a recipe I'd seen for olive brined octopus heads about 4 or 5 years ago. These brined heads are absolutely divine for someone that enjoys seafood and mediterranean flavours. If you like marinated octopus are baby octopus grilled on the barbecue then this is a must try as it takes the ordinary marinated octopus for a ride, its fantastic with crusty bread rubbed with a clove of garlic or just on their own with the accompaniments of a good olive oil, some chilli paste and fresh oregano. I think next time that I purchase baby octopus I will be looking for a recipe to make something with the tentacles which will become the by-product of the heads used for this dish. The recipe below has been scaled for about 12-15 octopus heads and could quite possible do enough for 30-35 heads.
                 To make the olive brined black octopus heads was a journey of anticipation the whole time, beginning with placing the washed severed octopus heads into a small saucepan together with mirepoix sauteed in butter which are aromatics, a combination of diced celery (1 stick), carrot (1 small) and onion (1 small) . I also added 1 bay leaf, sprigs of fresh thyme, a piece of orange peel zest, salt, pepper, enough water to cover the heads, which for me was 1 metric cup and 1 tbsp of squid ink. This was simmered gently on a low heat for an hour covered. While this was happening my mouth was salivating from the smell in the air and after an hour I was ready to just make pasta and run the octopus and its sauce through the pasta and just eat them then and their. I strained the contents of the saucepan, discarding the solids except for reserving the now shrunken octopus heads and returning the strained liquid back to the stove and reduced the liquid down to a syrupy consistency of about 2-3 tablespoons in quantity. I returned the heads back to the saucepan of reduced liquid to coat them in the sauce, this was then allowed to cool completely. Then in a sterilised jar with fitting lid a scraped the heads and the contents of the saucepan and poured in enough olive brine from brined olives to cover the heads, about 1/2 a cup. I then screwed the lid of the jar on tight before shaking the contents and placing in the fridge to marinate for 24 hours, shaking every 6-8 hours to mix the squid ink which tends to sink to the bottom. A day latter the heads had blackened a bit, but to get the black shiny look I coated the heads in a mixture of olive oil, lemon juice and warmed squid ink just before serving. The oregano was from the garden and is a white greek variety, the chilli paste is just that red chillies pureed to a paste.


Monday, 7 July 2014

' BAKED TAMARILLO in RED WINE & HONEY .'

Red wine & Honey baked Tamarillo served with Popcorn infused creamed rice and ground Native ginger seed.

                      So many people are reaping the rewards of their citrus harvests around this time, everyone except me. As there is something about the citrus tree and me and the countless times I've tried to grow any of the citrus varieties. The pest infestation, root rot, you name it I've experienced it, the frustrating thing is people have trees neglected dropping fruit in the corners of their backyards. So over the years of attempts now I've found the fruit trees from South America have been the best performers in our backyard that is located in a sub-tropical region but quite shaded. We now have several species growing and some having just finished their fruiting seasons and some that give off rogue fruits at any time of the year. We have tamarillo, guava, cherry guava, chilean guava, jaboticaba, brazilian cherry, vanilla vines, yam bean plants, soursop, custard apple, feijoa, pepino, abiu, passionfruit and coffee. Although coffee is not native to the region it is widely grown there for quite some time now. Tamarillo grow really well here and are a fast growing tree that can bear fruit at a year and a half old and mature on to become prolific bearers. This is a simple little dessert pairing the tang of the tamarillo with a creamed rice flavoured with butter popcorn. The seasoning used on top of the creamed rice is ground native ginger seeds imparting  flavours of pepper and ginger to add a little zing. The native ginger seed once chewed by our indigenous people and spat out along the paths to mark the trails that lead to food sources. The taste similar to the spice Grains of paradise of which also comes from the berry of another ginger plant.                                                                                                                          
                      To make the creamed rice I placed 2 cups of milk, 2 cups of prepared popcorn and 2 tbsp of melted butter in a saucepan and brought to the simmer before being removed and allowed to steep for 20 minutes or so. This was the strained and the popcorn infused milk was set aside. In a saucepan a 1/2 cup of rice and a 1/2 cup of water was brought to the boil. To this I gradually added the popcorn milk with another 2 cups of plain milk and a 1/4 cup of sugar, this was reduced to a simmer for around 30- 35 minutes until thick and creamy. For the baked tamarillo I simply preheated the oven to 160C, wit a sharp knife I made a small cross in the skin of the pointed end of the tamarillo. The fruit was then left to soak in boiling water for 2-3 minutes before being refreshed under cold water. I then cut the fruit in quarters starting from the pointed end cutting three quarters of the way through to the stem end. I then peeled back the skin of each section a placed the fruit in an oven proof dish with 1 cup of red wine, star anise and 2 tbsp of honey, covering loosely and baking in the oven for 15 minutes. I then removed the cover, basting the tamarillo 2-3 times while baking the fruit for a further 10 minutes uncovered until soft and tender but still holding structure. This was then cooled before being served with creamed rice.


Sunday, 6 July 2014

' CHESTNUT & MAPLE CREME BRULEE .'

Chestnut & Maple Creme brulee, Spiced Pumpkin tuile, Callebaut Chocolate decor and Roasted chestnuts.


                    When I think of chestnuts, for me its very much a winter thing. With fond memories of the big chestnut trees in Melbourne and the aroma of roasting chestnuts from the street vendors, wafting through the main streets and side alleys of the inner city hub or the sunday markets. Its a very comforting aroma that instantly makes you feel warm inside, despite the weather. For me the aroma from roasting chestnuts is such an association trigger for the city streets of Melbourne, as popcorn is for the movies. When I moved up to Queensland, where the sub-tropical climate and low chill in winter doesn't allow chestnuts to grow I noticed that the nut of choice for street vendors was the macadamia nut. The macadamia nut was virtually unaffordable for people of Melbourne and the thought of it being sold by street vendors, is that similar to Queenslanders and chestnuts, it just doesn't happen. So when I saw these chestnuts on the shelf I just had to purchase them for the nostalgia. This is a very simple recipe and you could be sitting down to eat your rewards in just over an hour, so below I've added A scaled recipe and detailed method for those that would fancy trying the recipe. Both the chestnuts and the maple syrup give the custard a real lift to an otherwise plain vanilla flavour.                                      
                    Into a blender I added 75g of chestnuts peeled and chopped together with 120g of milk, 15g vanilla extract, 15g of maple syrup an a pinch of salt. This was blended to a puree and set aside. In a bowl I whisked together 105g of egg yolks and 105g of caster sugar vigorously but without aerating the mix. To this I added 270g of heavy cream and the puree, these were mixed to incorporate and then poured into ramekins, this recipe makes 6 serves. I then placed the ramekins on a tray filled with water and baked them at 160 degree C. for about 55 minutes or until the brulee no longer trembles when gently shaken. The brulee's were then removed from the water bath and in a small saucepan I melted some sugar until syrupy and amber in colour. This was poured thinly over each creme brulee and allowed to set, giving the custard a thin caramel crust as apposed to the traditional technique to brulee sugar with a blow torch.                                                                                                                            
                    To accompany the dessert I made a spiced pumpkin tuile by melting 50g of glucose in a small saucepan over a low heat. To this I added 60g of pumpkin puree and this was then poured into a mixing bowl with 75g of icing sugar, 60g of flour, 1tsp of mixed spice. This was mixed to form a stiff batter and spread organically over a lined baking tray, these were then baked for 5-6 minutes in a 190 degree oven until the edges of the tuile's start to brown. While they were still warm I was able to shape them and then allow them to cool. To make the callebaut decors I simply melted the good quality Belgium couverture chocolate in a bowl in the microwave in 30 second stints, checking each time. This was then poured into a decorative mould and placed in the fridge to set before being sliced into decors. Below I've shown a few variations of plating up, using different shaped ramekins, tuile's and decors.


Monday, 30 June 2014

' PUMPERNICKEL - Imbisse drie Wege .'

Pumpernickel - Snacks three ways. (Toast with Cod liver, horseradish, cucumber, red lumpfish caviar & fennel frond.) (Ravioli filled with Pork brawn served with whole seed mustard, sauerkraut, pea greens & pickled cucumber sauce.) (Sauce served with pulled pork bundle, stewed apple & sage leaves.)


                   Pumpernickel bread has a strong childhood nostalgia with me as there was pumpernickel in our house every that I can think of growing up. Pumpernickel was dads thing and he had it for lunch every day of the week with good butter, cheese and various cold cuts like salami, mortadella, brawn or bloodwurst. I used try it a bit with cheese and salami but for kids in the 80's you can't go past a slice of white vienna instead. It wasn't until later in life that I acquired the developed taste receptors for the complexity of the malty dark rye used in the making of pumpernickel. If beer were white vienna then pumpernickel would be the stout. For this exercise I wanted to capture that essential pumpernickel flavour and present its base in different preparations that are not normally associated with the flavour of pumpernickel for example pumpernickel pasta or pumpernickel sauce.                                                    
                     Below are a detailed description of the three different preparations and the methods I used in making the various snacks you see above.                                                                                            
PUMPERNICKEL TOAST- ( Cod liver, horseradish, cucumber, red caviar & fennel frond.)
This was a very simple no fuss presentation, also the one presented to start the diner off allowing them to capture the pumpernickel in its pure form, only toasted to enhance the flavour. On top of squares I cut from thinly sliced pumpernickel and toasted, I placed a spoonful of minced horseradish. The next ingredient has come under critics eyes over the last decade or so and thats cod liver and the famous cure all colds and flu of the past cod liver oil which is now manufactured by farming an algae which produces the essential beneficial part of cod liver oil, the omega oils that the body can't produce. There are claims to waters being polluted where cod are being harvested therefore poisoning the livers and ours. Back to the liver itself it took me a while to get my head around trying one as I also vividly remember the taste of cod liver oil as a child. To my surprise, it tastes nothing of that and more like that of a sardine in oil and was quite nice by itself but even better with the accompaniments. On to of the liver I needed a platform to hold the red caviar so I opted for a thin slice of cucumber giving a crisp, cold element to the snack, cutting a bit of the richness of the livers but also giving me the flat surface to place the caviar and fennel frond to finish.                                                                                                      
PUMPERNICKEL RAVIOLI- ( Pork brawn, whole seed mustard, red sauerkraut, pea greens & pickled cucumber sauce.) I have seen pumpernickel pasta done before in different ways, and by now there would be much that hasn't been formed into pasta. So I do stress this is no ground breaking experience but what I have found that no one has detailed how they came about there finished product, so in that respect this was a new experiment for me. I started making the dough the night before by first soaking crumbled slices of pumpernickel bread in hot water and let stand for 30 minutes to soften the kibbled grains in the bread and for all the water to soak into the bread. I then pureed this mixture until it was smooth, this was then run through a strainer and I collected 160ml of the puree. In a bowl I placed 2 cups of wheat flour and 2 tbsp of the black cocoa powder and to this I gradually added the puree to form a dough. I then kneaded the dough a little on a floured surface before rolling out thin, flouring and leaving out at room temperature covered over night for the flavours to mature and the pasta become a dark brown colour resembling what its made from. To make the pickled cucumber sauce I juiced a deseeded cucumber with its skin, placing the strained cucumber juice in a small saucepan I added some rice wine vinegar, sugar and a little salt. This was brought to a boil and reduced to a simmer for 5-1o minutes before removing a few spoonfuls to mix with arrowroot flour to form a paste. This paste was returned back to the simmering sauce, whisking until the sauce thickens and I removed the sauce from the heat and chilled in the fridge overnight. The next morning the pasta was re-rolled out on to a floured surface to about 2mm thick and circles were cut out from the pasta using an upturned glass. I then used these rounds to make ravioli filling each one with minced pork brawn. The edges were pinched sealed using the end of a fork and the ravioli were cooked in salted boiling water for 3-4 minutes. I served the ravioli with whole seed mustard and red sauerkraut along with the pickled cucumber sauce.                  
PUMPERNICKEL SAUCE- ( Pulled pork, stewed apple & sage leaves.)                                              
The process of pureeing pumpernickel lead me to think of sauces and with that I came up with this pumpernickel infused gravy to be served hot with pulled pork and apples. The sauce was simple a puree made like above but this time from chicken stock instead of hot water. Once the puree was made I placed this into a saucepan and reduced this down with a splash of soy sauce until the pumpernickel gravy was thick and velvety. I served this with a bundle of pulled pork tied with a garlic chive, this was accompanied by a round of apple stewed in a syrup of water, sugar and lemon juice until soft and tender. I placed a sprig of fresh sage leaves from our veggie garden to finish the dish.


Saturday, 28 June 2014

' EGGS BENEDICT. V-1.1 .'

70 degree C. Egg yolks, Poached whipped egg whites, House hollandaise, Crispy parma ham, Maple bacon curls, Toasted English muffin, Olive herb and Tarragon sprigs.


                    Eggs Benedict is a classic breakfast dish that has stood the test of time and the basic four ingredient combination of bacon and poached eggs on an english muffin with hollandaise sauce, has been a target for deconstruction, reconstruction by many a modern day chef. In this version (1.1) I've employed some of the techniques to the eggs made famous by chef Wylie Dufresne's Eggs Benedict served at his world renown WD-50 restaurant. Wylie does his egg yolks sous vide 70C for 17 minutes producing yolks that have a texture of soft dense fudge that coats your mouth. And another of his techniques is to poach whipped seasoned egg whites in barely simmering water, forming a savoury meringue that is delicate and dissolves in your mouth. This plate took me back to the days at Acland St.
St.Kilda in Melbourne where I served time as a breakfast chef, starting my commute to work at 4am to get to the restaurant to set up for busy breakfast crowds of Eggs Benedict and some its variations. My main task and one of the two main tests I had to keep my job was the big batches of 2 dozen egg hollandaise sauce, there would be two to do sometimes three. My first morning on my own after earning the trust of head chef to make the sauce I split the sauce halfway through, a bit of panic set in with the time I had lost not to mention the eggs. I managed to get it back with a little cold water and I was saved, since then I've never had to make such large quantities of the sauce so I use a quick method which is fail proof using a blender.                                                                                                                    
                    I've outlined the techniques and methods to this dish below in order of execution .
70C SOUS VIDE EGG YOLKS- For the yolks I lightly beat the yolks breaking the membrane up and then seasoned them with a little salt and pepper. I then placed the yolks into a sealed piping bag and in a 70 degree C. water bath for 17 minutes but after cutting the tip of the bag and trying to pipe the yolks were still runny so the piping bag was sealed again and placed in for another 30 minutes at which I achieved the texture of fudge.
POACHED WHIPPED EGG WHITES- In a mixing bowl I placed some egg whites with a little seasoning and using the electric whisk, I whipped the whites to a soft peak before adding a little cream of tartar and whipping to a stiff peak. Using two dessert spoons I made quenelles and placed them gently into an 85 degree C. water bath to poach, turning over after 2-3 minutes and then removing with a slotted spoon.
HOUSE HOLLANDAISE- This is my quick, fail proof easy blender version and not the traditional over the stove whisking until your arms drop off in hope through the whole 10-15 minutes that you don't split it and ruin your work. So here goes on the stove I gently melted 10 tablespoons of unsalted butter without letting to much liquid to evaporate off the butter. In a blender I placed 3 egg yolks, 1 tablespoon of lemon juice, a pinch of both salt and cayenne pepper, blending on a medium speed until the mixture becomes lighter in colour about 30 seconds. The friction from the blades heats the yolks up a bit and the blending motion adds air making the mix light and fluffy. I then turned the blender to low and drizzled the melted butter in slowly while the blender was running, continuing to blend for further 5-10 seconds until the butter incorporates. Store beside the warm stove top until ready to serve.
CRISPY PARMA HAM- I placed thin slices of the parma ham on to a lined baking tray and baked the ham lightly on both sides in a 160 degree C. oven until crispy.
MAPLE BACON CURLS- To make these which give a sweet element to the dish I simple rolled maple cured streaky bacon and fixed them with a tooth pick before basting in maple syrup and pan frying until caramelised and crispy, removing the tooth pick to serve.
TOASTED BREAKFAST MUFFIN- To make this I simply sliced thin slithers of the muffin, rubbing them in the rendered fat from the bacon and maple syrup, before lightly toasting both sides under a grill.
OLIVE HERB & TARRAGON- Both these herbs make the perfect match for egg dishes and were both harvested from our veggie garden to be used as finishing garnish for this plate.


Thursday, 26 June 2014

' EDIBLE FOREST FLOOR in WINTER .'

Deep fried Reindeer Moss, Pine oil powder, Truffle oil powder, Truffle infused Dark chocolate branches, Porcini creme fraiche, Morels and Semi-dried Parsley leaves.

                  When plating this taste sample dish theres one ingredient that sparked the whole dish when I thought about it. A couple of weeks back the family went for a drive to the rainforest nearby and after we had some lunch we drove to a popular water hole. The 100m walk to the water whole from the car park was littered with native bush food plants from a rejuvenation program many years ago. Along the walk I came across a piece of reindeer moss growing suspended in the branch of a tree lining the path. I brought the sample home and started the research on its gastronomical ability. After a bit of research and a positive identification I found that the moss used to be served at one the worlds most famous restaurants in Denmark called ' Noma '. The danish restaurant served the lichen deep fried, seasoned with porcini mushroom powder on a saucer of live moss with a side dish of creme fraiche. So I decided to take the idea and serve the lichen with a few other european forest inspired ingredients to accompany, creating a scene from the winter forest floors of europe.                                                          
                   The methods for all the preparations are listed below and are not in order of execution.            
DEEP FRIED REINDEER MOSS- This was simply as it says deep fried and very quickly before being left to drain on a paper towel. The fried light brown fibres of the lichen dissolves, crumbling away on your tongue leaving a delicate taste of earthy truffle, with sweet grassy and vanilla notes.        
PINE OIL POWDER- To make this powder which is the one with greener tint, I made some pine oil by blending together chopped pine needles and olive oil until the oil turns green and the pine oil has infused with the olive oil. This was then strained and mixed at a 40/60 ratio with N-Zorbit which is a Tapioca Maltodextrin, which is a modified starch like corn flour but made from cassava root. N-Zorbit has the ability to turn fats into fluffy powders that melt back to their oils on your tongue with next to no spoiling to the flavour. The pine oil and n-Zorbit were mixed together using a fork until fluffy and powdery. The downfall to the starch is when it becomes in contact with any other fluid other than oils or fats, N-Zorbit turns to an instant sludge and not a delicate fluffy powder.                                                  
TRUFFLE OIL POWDER- Same as above except substituting the pine oil for white truffle oil.

TRUFFLE INFUSED CHOCOLATE BRANCHES- This were made by roasting parsley stems in the oven until brown and hard, these were then coated in melted dark chocolate mixed with a little truffle oil and placed in the fridge to set.
SEMI-DRIED PARSLEY LEAVES- I simply placed the leaves on a flat tray and dried them out in an 80 degree C. oven until they just turn light brown, before removing and setting aside to plate.
PORCINI CREME FRAICHE- To make the final prep I placed dried porcini mushrooms in a spice blender, blending to form a powder, I then mixed the powder with some creme fraiche until it was all incorporated. This was then placed in the fridge to chill and firm back up before serving.


' MOUNTAIN PEPPER & WATTLE SEED DAMPER .'

Mountain Pepper & Wild Green Wattle seed Damper with Wattle seed butter, Rainforest fruit jam, Micro Cinnamon & Lemon myrtle leaves and Silver Wattle flowers.


                This little dish, most likely served for afternoon tea is a bit of, when bush tucker meets devonshire tea. Inspired by a little field trip with my two sons in the wetland catchment adjacent to our property. The area is a natural haven for all different water bird, heath and native trees and shrubs and on the fringes wattles and pine. On the walk we managed to forage a 2 litre bucket full of wattle seed from a Green wattle tree and some branches of Queensland Silver wattle bloom, along with some pine needles for a different prep. There are 120 edible Australian acacias, and are being used by the indigenous people of Australia in many ways. Common varieties for seed for this area are the Green, Brisbane, Silver, Cootamundra, and the Velvet wattles. Seed was traditionally eaten either green ( and cooked ) or dried, roasted and pound to a flour to make a kind of bush bread, the damper. The flowers were mixed into a batter and a kind of pancake were cooked on hot rocks and an adhesive was made from the gum (sap) that runs from the trees trunks, in modern bush food cooking this can be used in substitute for other gums, to thicken sauces and set jams, imparting a resinous botanical undertone. Wattle seed when roasted has a nutty malt flavour with a hint of carob. I've used the wild harvested Green wattle seed in making both the damper and the butter. The mountain pepper berry is store bought and comes from Tasmania where it flourishes in the cool mountain climate and the Rainforest jam refers to the native fruits gathered from our backyard food forest. This jam was made about 6 months ago and is a perfect time to make it to the plate. Below are a list of the preps in order of execution.                                            
               In our food forest we have planted out 18 species of bush food plants and there were another 4 species already existing when we arrived at the property. Six species of the ones planted have not survived, leaving us with 16 different bush foods growing through our yard of which 10 of these were used to make the rainforest fruit jam.                                                                                                    
RAINFOREST FRUIT JAM- To make this jam I first made two cups of strong tea from crushed Cinnamon and Lemon Myrtle leaves, this was then strained into a heavy based saucepan to this I added a squeeze of half a lemon and the green seed pods from the rosella fruits. This was brought to a simmer and cooked down for around 10-15 minutes to release and activate the pectins in the pods. Once thickened, the syrupy liquid was strained and returned to the saucepan adding all the prepared fruit ( Rosella calyxes, Midgen berries, Magenta cherry, Lilly Pillies, Sandpaper figs, Native lime berries, Cedar bay cherries and Atherton raspberries). The fruit was cooked down until soft and then measured, adding an equal portion of sugar and returning to the stove to simmer until the jam set on a cold plate.                                
MOUNTAIN PEPPER & WATTLE SEED DAMPER- To make this edible acacia bush bread I began by preparing the wattle seed flour by de-podding the seeds and roasting them for around 10 minutes on a flat tray in a 210 degree C. oven, frequently tossing them around to get an even roast. The seeds were then cooled and ground to a flour in a spice grinder. I also ground some whole pepper berries to a cracked pepper consistency. Then in a mixing bowl I rubbed 60g of softened butter through 3 cups of self raising flour to form a crumb. To this I added 30g of roasted wattle seed flour, a teaspoon of salt and 10g of ground mountain pepper, this was mixed through the crumb to evenly disperse. I then made a well in the centre gradually adding 1 cup of Oat milk mixing to form a dough. The dough was then divided into large spoonful portions and baked in a 200 degree C. oven for around 20 minutes, until golden on top and cooked in the middle.                                                                                                        
WATTLE SEED BUTTER- While the mini bush breads were baking I soaked 2 teaspoons of roasted wattle seed flour, 2 teaspoons of raw sugar, half teaspoon of vanilla extract in a quarter cup of boiling water for 30 minutes, this was then poured through a sieve and set aside. In a small bowl I creamed a half cup of softened butter using a stick blender until soft and fluffy. To this I added the concentrated wattle seed essence and with the stick blender mixed until thick and incorporated. This wattle seed butter can be kept for a month covered and refrigerated.


Sunday, 22 June 2014

' 64.C poached & fried EGG with ASPARAGUS .'

64 C. poached & fried Free range Hen egg, French Tarragon infused Asparagus ribbons, Crumbled croutons, Balsamic vinegar reduction, Fresh Tarragon and Viola flower.

              The night temperatures have dropped quite rapidly here at the moment but our hens are in their first season and are laying strong through the start of our winter. Hence the egg recipe, which is in fact a recipe from the great Eddie Shepperd, award winning vegetarian chef in the U.K. I chose to use, (copy what ever you may call it) Eddie's recipe because of his use of techniques in making the dish, the simple egg cooked in a way you can really appreciate eating it and accompanied by the perfect pairings. We got our three girls going on 3 months ago now and if there was an eighth day in the week we would get 2 dozen eggs. We couldn't be happier, they couldn't be happier and its a great mutualistic  relationship. Free ranging is a different story, almost everyday the Isa brown gets out and I'm having to go and retrieve her from next doors backyard, the park or half way up the street where she's foraging on someones front lawn. Anyway below I've listed the techniques to this tasty vegetarian breakfast of asparagus and egg with crouton and balsamic reduction.                                                                          
            To begin with I started with the asparagus, setting my sous vide machine to 85C. I then vacuum sealed asparagus spears with a little butter and some fresh tarragon from the garden. The sealed asparagus was then placed in the water bath and cooked for 15 minutes before being removed and placed in an ice water bath to stop the cooking. Once the asparagus was cool enough I sliced them into halves or ribbons and dressed them with a little olive oil, a squeeze of lemon juice and a little salt and pepper to season, these were then stored in the fridge and warmed gently before serving. I then set the sous vide water bath to 64C. and carefully placed the egg in the bath with the shell on, cooking the egg for 1 hour. Once the egg was ready I broke the egg into a frying pan, frying the egg for a 30 seconds on one side only before removing and plating immediately. While the egg was cooking I prepared the balsamic reduction and the croutons, beginning with the reduction I placed some balsamic vinegar into a saucepan with and brought to slow simmer, reducing the vinegar by a third. This was then set aside to thicken up. Next I prepped the croutons by tearing up some good quality white bread and frying the pieces in a little olive oil and garlic until golden in colour. I the crumbled the croutons up lightly and seasoned them with salt.                                                                                                                            
               To plate I placed the warmed asparagus in the centre of the plate in a loose bundle letting them sit where they naturally fell. I then placed the hot poached then fried egg on top of the asparagus and seasoned with salt and cracked black pepper. I then scattered the crumbled croutons in a rough line starting from the top of the egg out to the edge of the plate. Delicately dotting the thickened balsamic to make an arch around the egg and finally garnishing with a fresh viola flower and a sprig of fresh french tarragon from the garden.


Friday, 13 June 2014

' ALPINE POTATOES .'

Fingerling Potatoes in a progression of textures & temperatures, - Baked Potato skin, Potato salad, Raclette potato, Juniper roasted potato, Potato soup and Crispy potato spoon & bowl.

                  First of all I must apologise to the followers of this blog for the lack of posts lately, as I have
just had surgery on my foot I haven't been able to make it into the kitchen or the backyard having said that, which is where my inspirations come from. Anyway here it is the first post for winter for this year and for a fitting kick off 'the humble potato'. This dish exposes the diner to the many ways the potato can be served. I've used the alpine theme with the likes of pine needles, conifer and juniper berries to act as the main component in flavouring the potatoes. The berries, like the needles, have a clean, bracing botanical flavour. This plate takes the diner on a progressional journey of textures, temperatures and techniques, making the boring old spud look a bit more enticing. Below I've highlighted each prep and its respective technique, these are not in any order of execution but for a tip letting the puree for the 'Raclette potato' hydrate over night does help with this technique.                                                                
BAKED POTATO SKIN- (hot, cold) Juniper, creme fraiche, caviar.                                                          
This is a taste of earth, sea, pasture and forest. To begin with I made a juniper oil by blending juniper berries with olive oil and straining the oil through a mesh sieve. I then baked the potato in a 170 deg. C. oven until tender. I then cut the potato into wedges, scooping out the pulp, the skin was then rubbed with the juniper oil and placed back in the oven to go crispy. Once removed, I placed a dollop of creme fraiche on to the skin and topped with black caviar, serve immediately.                                                        
POTATO SALAD- (cold) Pickled 83 deg. C. sous vide potato, mustard mayo, pine snow.                    
83 degrees is the optimum temperature for sous vide vegetables. Cooking the potatoes in vinegar and salt pickles them as they cook and the pine needle snow gives a refreshing jolt against the spice of mustard and the earthy potatoes. Thinly sliced potatoes, a dash of white wine vinegar and a pinch of salt were placed into a vacuum sealed bag and placed in to an 83 deg. C. sous vide bath for 90 mins. Once the potatoes were tender, the potatoes were removed from the bag and chilled in the fridge until cold. To make the pine snow I blended washed, finely chopped pine needles with water and a little glucose. This was then passed through a cloth lined sieve an poured into a plastic container and placed into the freezer. At the same time I placed a metal bowl in the freezer to chill. Once the the pine water was frozen solid I grated the ice into the metal bowl and placed the bowl of snow back into the freezer until I was ready to serve. For the mustard mayo I mixed two parts prepared mayo with one part wholegrain mustard and seasoned with a little honey and salt, this was also chilled to serve.                          
RACLETTE POTATO- (warm) Potato puree, Raclette cheese.                                                              
Raclette means both a type of cheese and also the name of a traditional Swiss winter meal where a round of cheese is placed by the fire and then the melted part of the cheese is scraped onto plates and accompanied with potatoes, gherkins and other fare. Raclette cheese has fantastic melting properties and is perfect for this technique. I used methocel for this preparation which forms a firm gel when heated and reverts back to its original state (in this case a puree) as it cools. But for best results it should be hydrated over night. I started this prep by boiling potatoes in salted water until tender. I then pureed the potato with a little melted butter, milk and a pinch of salt. I then added 5g methocel to 100g of water and blended with a immersion blender for about 2 minutes, this was then mixed into 160g of puree and placed covered in the fridge over night to hydrate. The next day I preheated the oven to 120 deg. C., I then filled a mould with the puree (in this case I used an eggshell for the mould), this was then baked for 8-10 minutes. Once firm the hardened potato puree was un-molded on to a lined baking tray, I then placed a thin slice of the raclette next to it and placed the tray back in the oven to melt the cheese. The cheese was then scraped from the tray lining and draped over the potato, smoothing the cheese to form a skin. With a strong brew of coffee paste and a small paint brush, I added some markings to resemble the potatoes imperfections and eyes. The potato was then lifted and plated to be served immediately.          
JUNIPER ROASTED POTATO- (hot) Coffee oil, juniper berries, sea salt.                                                  
With this I roasted the potato in juniper berries, the virgin coffee oil  rounds out the woody notes of the berries nicely. I simply roasted the potato in a 180 deg. C. oven with crushed juniper berries and a little olive oil, once tender the potato was served hot on a bed of conifer and the potato was topped with a drizzle of virgin coffee oil and a sprinkling of juniper berries and sea salt.                                        
POTATO SOUP- (hot) Smoked potato, blue cheese, gin.
Comforting, creamy earthy potatoes with the complexity of smoke, combined with the tang and bite of blue cheese with a kiss of gin. I first boiled potatoes in salted water until tender, once cooled I smoked the potato lightly before blending to a puree. In a saucepan I heated a little butter, milk and blue cheese until the cheese and butter had melted, to this I added the smoked puree and a splash of gin, seasoning with salt and pepper this was served hot.                                                                                
CRISPY SOUP BOWL & SPOON- Potato.                                                                                                
The final prep I carved a bowl and spoon from two larger potatoes, rubbing with a little olive oil and seasoned with sea salt I then roasted the potato spoon and bowl in a 180 deg. c. oven until crisp and crunchy. To ensure the soup bowl didn't leak soup everywhere, I prepared a water gel with a little gellan gum and lined the inside of the bowl. A great way to finish.